How to use Notion is one of the questions I get the most around here.
I even created a series explaining how you can organize your life with Notion on YouTube. It is a series that teaches you how to set up a complete and complex organization of your life.
However, not everyone needs or wants a complete and complex organization, but something simple to keep up with life's tasks and goals.
So I decided to put together this quick tutorial to teach you how to use Notion, in a simple, direct and easy way and set up a structure that will already give you peace of mind to manage your projects.
If you want to be a more organized person but don't want to spend a few hours learning how to use Notion, let's go with this tutorial on how to use Notion by creating a simple organization of life.
But first, if you're still a little lost about what Notion is, let's go with a quick explanation.
What is Notion?
Notion is an organization and productivity tool that can be configured and connected according to the needs of those who are working with it. That is, its modular capacity makes it possible to create various types of tools and customized structures.
It is possible to manage tasks, use as a calendar, create knowledge base, productivity dashboards, among others.
The most basic principle of the system is that everything is a page. A page can have other pages within it and you can organize pages into databases. Within pages, in turn, you can create various types of content, such as images, videos, texts, links, icons and relationships with other pages.
However, this theory only takes us so far. So let's get practical and the concepts will take more shape as we learn how to use Notion.
Framework for learning how to use Notion
Before we get into the execution and learning how to use Notion, I think it is important to understand the concept of this organization. There are two main goals with this type of organization:
- Having a place to put tasks and being able to organize them according to their importance and urgency
- Having a place to record important information
There are other things that can be done, of course, but to make it leaner, this is the core.
And for that, we will follow the following structure:
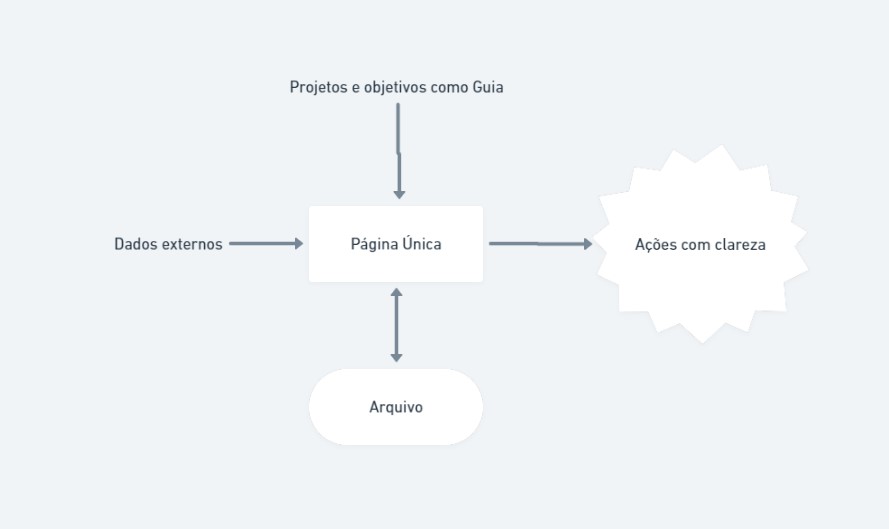
We have the external data, which are our tasks and projects, to add on a single page in Notion. This page will serve as a guided dashboard to show us the most important information for the day to day.
Also, we will keep an archive of important information as there are things that are good to keep.
In addition, we also have as a guide our projects and goals in life, whether they are short, medium or long term. Having this always in mind and highlighted will help us not to deviate too much when working and give us that false sense of productivity when in fact we are procrastinating.
The result of all this is that every day we can perform tasks and actions with clarity. Understanding that what we are doing contributes to our goals.
This panel will have the following modules, or parts:
- Project list
- Task list
- Calendar
- Weekly routines
- Notepad
- Relevant links
Something I recommend you do before starting is to perform the ‘mental cleaning' process described in this other article. So you will already have ready what are your projects and tasks to put in this organization. We will not organize all types of projects, goals and everything, but I find the process beneficial to be clear about what is really important.
So let's now set up this structure and learn how to use the notion.
Building the Dashboard in Notion
In your Notion, click on the “New Page” button in the bottom left corner of your screen and name this page the way you prefer. Then, to improve your visualization, click on the three dots in the upper right corner and check the option “Full width”. This will stretch your page and give us more space to work with.
Now, you should have something more or less like this:
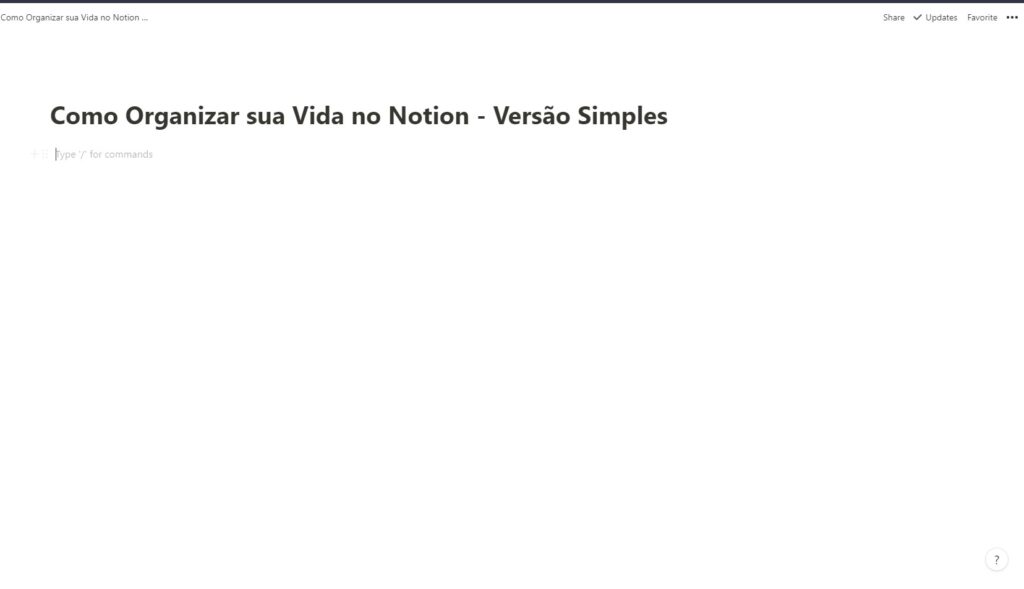
Cool, now let's structure that page.
When you are in the editing area of the page itself, you can type the command “/” to open the block creation options. Do that and start typing “toggle” to select the option of that same name.
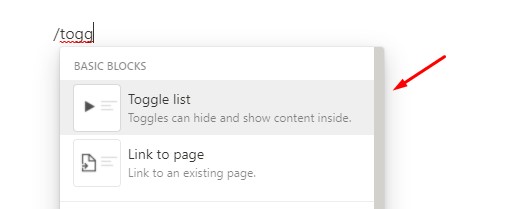
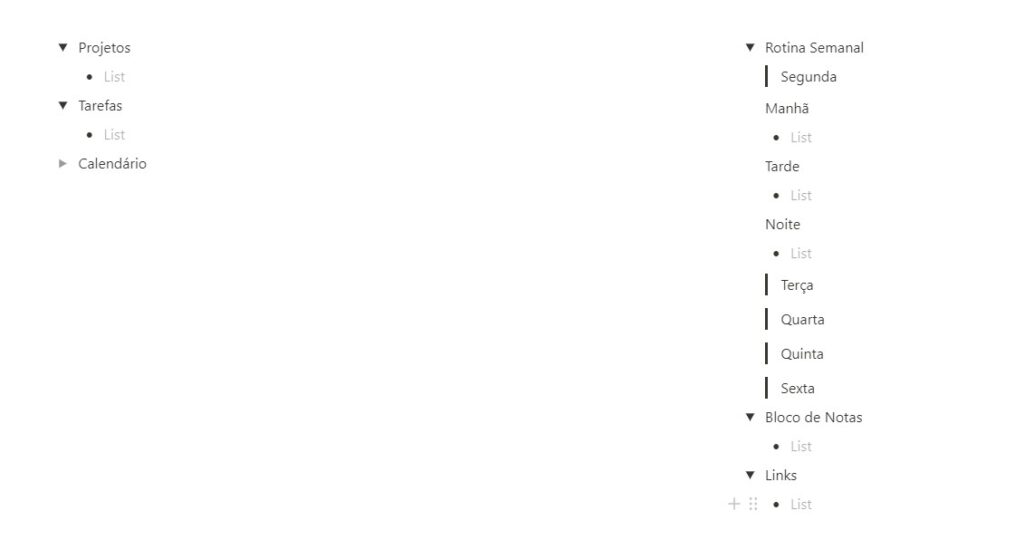
Create 6 of these toggles and then drag one of them to the right by clicking on the six little dots on the right side of the block and dragging it to the side. Throw another two below the one you dragged to the side to leave three in each column.

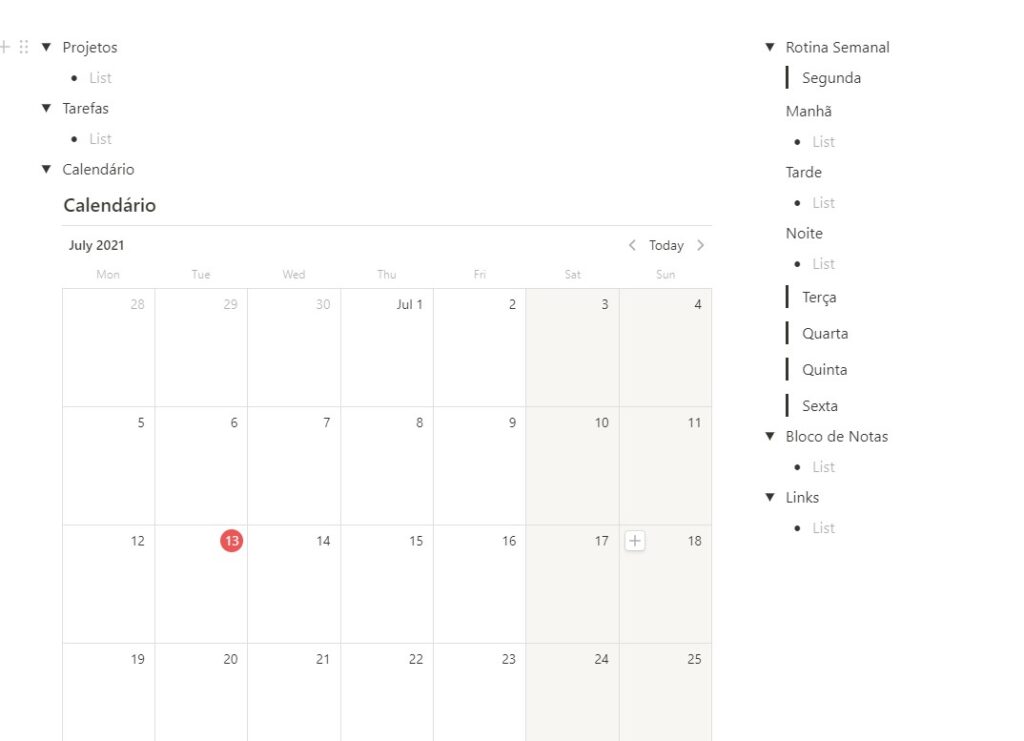
Now we can rename each of these with the names of the areas above. You will have something like this:

Moving on, it's time to understand how we are going to use each of the items.
First, open the first Toggle, Projects, and create a list (just type “-” and press space).
Do the same for Tasks, Notepad and Links. As for the Weekly Routine, we will do something similar, but in a prettier way. Use the shortcut ‘/' and select the “Quote” block. Then name the days of the week and, if you want, the times of the day as Morning, Afternoon and Evening. See how it looks:
Finally, in the Calendar Toggle, click the shortcut to pull the ‘/' blocks and select the inline calendar.
To finish, create a new page on the lower left side of the screen and call it Archive. Here we will throw the old stuff from our system.
And so we finalize our construction.
How to organize life simply in Notion
The idea of having only one page in Notion (and an archive page only for some history) is to make it so that we don't need much effort to organize ourselves.
Everything we need is at our fingertips in a few clicks and organized within these tabs (toggles) so that the screen is always clean.
If you followed the recommendation to go through the reflection on your goals and mental unloading, then you probably now have a list of the projects you are working on and also the tasks you need to accomplish.
For these two items, therefore, you simply fill them in on the dashboard.
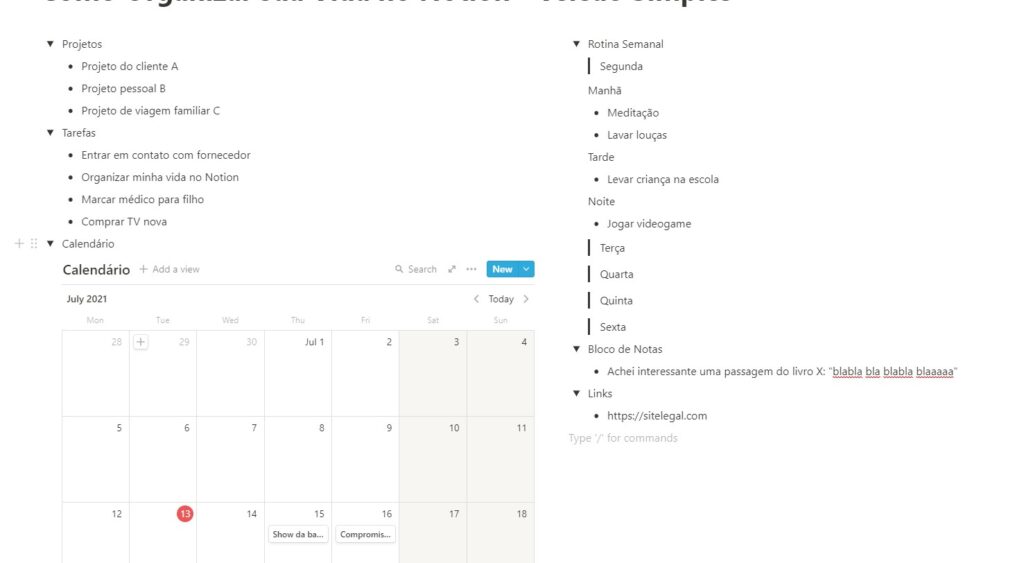
Similarly, fill in your weekly routine in the way that makes the most sense to you taking into account those things you would like and need to do each day. If it's a daily routine, you can even create a new toggle to include it and leave the weekly one for recurring tasks.
The notepad is for quick and simple notes. Things that you would like to remember or that you find interesting at some point. Depending on the volume, you can even create a database to put these notes. This goes for links as well.
Finally, the calendar is the most intuitive of all, as you just have to put your appointments on the right day. If you prefer, you can use Google Calendar and embed it in that same place with the “Embed” block. Just insert the link there and it will appear inside your Notion.
If you want to know a notion planner, I suggest you visit this article we created.
Why does this organization in Notion work?
Maybe you are wondering:
“But how can this help me organize? Isn't it too simple?”
As I mentioned earlier, each person has a way of organizing that works best. Personally, this way is incomplete, however I often find myself creating pages like this for certain moments in life because simplicity helps me organize.
A few days ago I gave up my more complete system for a few months and used a version similar to this to organize myself. Although I miss places to organize my readings, notes, ideas and tools, I had a great experience leaving my tasks in a simpler way like this.
The main goal of this organization is not to let our heads get lost. We should not forget tasks, ideas or important things or let unimportant tasks or not connected with our projects or goals take up a lot of our time.
And for that we just need a place to always visualize what we need to do and where we want to go. We can do this with one page.
Does it make sense? Tell me in the comments if you learned how to use Notion.
Have fun!

